
Faust For the Confined: Adding Faust DSP Support to Your JUCE Plug-ins
JUCE is a well-known framework for creating audio plug-ins (i.e., VST, AU, AAX, etc.) and applications for a wide range of platforms. Faust can be used to generate ready-to-use JUCE applications and plug-ins implementing the standard user interface (UI) described in the Faust code using faust2juce. However, it is so easy to make professional-looking UIs from scratch in JUCE that you might want to use Faust to implement the DSP portion of your plug-in and build your own UI.
In this tutorial, we demonstrate how to use the Faust compiler to generate a C++ DSP object and how to interface it with your JUCE plug-in/UI. We'll cover basic examples (monophonic synth, polyphonic synth, and audio effect) as well as more advanced applications involving polyphony, etc.
Simple Monophonic Synth Plug-In
<< Download the source of this tutorial >>
In this section, we demonstrate how to use a Faust synth to build a plug-in in JUCE with a custom UI from scratch.
Generating the DSP Engine
First, let's implement a basic subtractive synthesizer in Faust based on a filtered sawtooth wave (FaustSynth.dsp):

Feel free to run it in the web IDE to see how it sounds!
The output of the lowpass is split into 2 signals to create a stereo object.
Note that all the parameters are smoothed to prevent clicking (we want our plug-in to be clean!). Even gate is smoothed, which will apply a gentle exponential envelope when the trigger signal is sent, etc.
Since Faust will not build its own UI here, the type of UI element used in this code doesn't really matter. They just serve as a point of entry to control the parameters of the audio engine we're about to generate. So nentry could be replaced by hslider or vslider, it would not make any difference. However, we encourage you to always write "coherent" interfaces in case someone would like to use your Faust code "as such" at some point.
In order to turn this Faust program into a C++ DSP object usable in JUCE, we must use a Faust architecture file that will wrap the C++ code generated by the Faust compiler (that literally just contains an audio callback function). That's what faustMinimal.h (which is part of the package that you downloaded at the beginning of this tutorial) does. Actually, if you open it, you'll see:
#include <cmath>
#include <cstring>

#include "faust/gui/MapUI.h"
#include "faust/gui/meta.h"
#include "faust/dsp/dsp.h"

// BEGIN-FAUSTDSP

<<includeIntrinsic>>

<<includeclass>>

// END-FAUSTDSP
The faust/... files should be on your system if Faust is installed on it. If not, you can use the inlined version of the architecture file (faustMinimalInlined.h) which can also be found in the package that you downloaded at the beginning of this tutorial.
MapUI.h will allow us to easily control the parameters of the Faust object using their declared names in the Faust code. The other includes are necessary in most cases and are just parent classes of the DSP class generated by the Faust compiler. <<includeclass>> is where the code generated by the Faust compiler gets pasted.
This architecture file can be used with the Faust compiler simply by running:
faust -i -a faustMinimal.h FaustSynth.dsp -o FaustSynth.h
where FaustSynth.h is the name of the generated file that we will import in our JUCE project later in this tutorial. The -i option inlines the included C++ files in the generated file.
Alternatively, if Faust is not installed on your system, the Faust online IDE can be used to carry out the same task by choosing source/cplusplus in the Export (truck) function. The content of the downloaded C++ file can then be copied and pasted between the BEGIN-FAUSTDSP and END-FAUSTDSP tags.
We're now ready to create a new JUCE plug-in project!
Creating an Empty JUCE Plug-In Project
In this section, we'll assume that you're a bit familiar with JUCE. If that's not your case, don't panic and just read their Getting started with the Projucer tutorial. We also recommend having a look at the next few tutorials to get a sense of how things work. They're nice and easy to read!
In the Projucer, create a new Audio Plug-In, add the targets that you want, in the settings, make sure that "Plugin is a Synth" is enabled. In our case, we named it "MonoSynth" (choose this name wisely as it will impact the class names of your program).

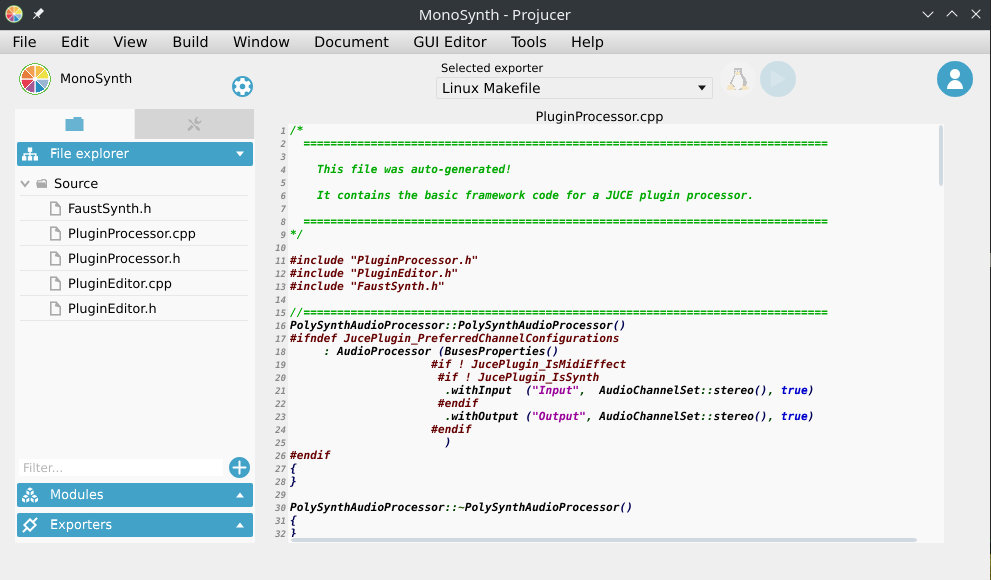
Now, place the FaustSynth.h file generated in the previous step in the Source folder of your JUCE plug-in project. Then select it in Source in your file browser and drag it to the Projucer so that it becomes visible in the Source tab:
At this point, try to compile your plug-in and see if it runs. Remember that JUCE now generates a "standalone plug-in" by default which is super convenient to test things without having to open the plug-in in a third party application.
Integrating the Faust DSP Object to The JUCE Project
Let's now integrate our Faust-generated DSP object to the PluginProcessor. Declare the following elements in the private section of the MonoSynthAudioProcessor class of PluginProcessor.h:
private:
    MapUI* fUI;
    dsp* fDSP;
    float** outputs;
    //==============================================================================
    JUCE_DECLARE_NON_COPYABLE_WITH_LEAK_DETECTOR (MonoSynthAudioProcessor)
fUI will be used to control the parameters of the Faust DSP, and fDSP will contain the audio DSP/callback itself (that's basically the object generated by the Faust compiler). In order to declare these objects without knowing the definition of MapUI and dsp you'll also have to declare empty class definitions at the beginning of the file:
class dsp;
class MapUI;

class MonoSynthAudioProcessor : public AudioProcessor
In PluginProcessor.cpp, include FaustSynth.h at the beginning of the file in the includes section:
#include "PluginProcessor.h"
#include "PluginEditor.h"
#include "FaustSynth.h"
Write the following in the prepareToPlay method:
void MonoSynthAudioProcessor::prepareToPlay(double sampleRate, int samplesPerBlock)
{
    fDSP = new mydsp();
    fDSP->init(sampleRate);
    fUI = new MapUI();
    fDSP->buildUserInterface(fUI);
    outputs = new float*[2];
    for (int channel = 0; channel < 2; ++channel) {
        outputs[channel] = new float[samplesPerBlock];
    }
}
Here, fDSP, which is the Faust DSP object, is first instantiated. Then fUI, which will be used to control the parameters of the DSP, is instantiated. These two objects are bound together using the buildUserInterface method of fDSP. Finally, memory is allocated for the stereo output of the Faust object. Note that outputs is a double array (one dimension for audio channels and one dimension for audio samples/buffers).
Conversely, write the following in the releaseResources method of MonoSynthAudioProcessor:
void MonoSynthAudioProcessor::releaseResources()
{
    delete fDSP;
    delete fUI;
    for (int channel = 0; channel < 2; ++channel) {
        delete[] outputs[channel];
    }
    delete [] outputs;
}
Here, we just free the memory allocated in the previous steps when resources are released.
Let's now get into the heart of the matter: the audio callback which is implemented through the processBlock method of MonoSynthAudioProcessor:
void MonoSynthAudioProcessor::processBlock (AudioBuffer<float>& buffer, MidiBuffer& midiMessages)
{
    ScopedNoDenormals noDenormals;
    auto totalNumInputChannels = getTotalNumInputChannels();
    auto totalNumOutputChannels = getTotalNumOutputChannels();

    fDSP->compute(buffer.getNumSamples(),NULL,outputs);

    for (int channel = 0; channel < totalNumOutputChannels; ++channel) {
        for (int i = 0; i < buffer.getNumSamples(); i++) {
            *buffer.getWritePointer(channel,i) = outputs[channel][i];
        }
    }
}
Here, we basically compute one full audio block of size buffer.getNumSamples(), we store it in outputs and we then link outputs to the actual audio output of processBlock (*buffer.getWritePointer(channel,i)).
At this point, you should be able to produce sound with your plug-in! Temporarily add the following line to the prepareToPlay method to set the value of the gate parameter to one:
fUI->setParamValue("gate",1);
Note how fUI is used here to configure the parameter of the Faust DSP using its setParamValue method which has 2 arguments: the path/name of the parameter in the Faust code, and its value.
Try to compile the plug-in for your desired target (e.g., VST, AU, etc.). In our case we'll just generate a standalone plug-in for convenience. When running the plug-in, you should now hear sound!
Since we want to control the parameters of our synth from the PluginEditor, we must create a series of public methods in PluginProcessor to control each parameter of our synth. In PluginProcessor.h this will look like:
public:
  void setFreq(float freq);
  void setGain(float gain);
  void setCutoff(float cutoff);
  void setGate(bool gate);
and the corresponding implementation in PluginProcessor.cpp will be:
void MonoSynthAudioProcessor::setFreq(float freq)
{
    fUI->setParamValue("freq",freq);
}

void MonoSynthAudioProcessor::setGain(float gain)
{
    fUI->setParamValue("gain",gain);
}

void MonoSynthAudioProcessor::setGate(bool gate)
{
    if(gate) {
        fUI->setParamValue("gate",1);
    } else {
        fUI->setParamValue("gate",0);
    }
}

void MonoSynthAudioProcessor::setCutoff(float cutoff)
{
    fUI->setParamValue("cutoff",cutoff);
}
That's it for the PluginProcessor! Easy, isn't it? Now, let's add a basic interface to control this synth.
We add a series of sliders, buttons, and labels to the private section of MonoSynthAudioProcessorEditor in PluginEditor.h:
private:
  Slider frequencySlider;
  Slider gainSlider;
  Slider cutoffSlider;
  ToggleButton onOffButton;

  Label frequencyLabel;
  Label gainLabel;
  Label cutoffLabel;
  Label onOffLabel;
and their corresponding implementation in PluginEditor.cpp:
MonoSynthAudioProcessorEditor::MonoSynthAudioProcessorEditor(MonoSynthAudioProcessor& p)
    : AudioProcessorEditor(&p), processor(p)
{
    setSize (800, 130);

    addAndMakeVisible(frequencySlider);
    frequencySlider.setRange(50.0, 5000.0);
    frequencySlider.setSkewFactorFromMidPoint(500.0);
    frequencySlider.setValue(300);
    frequencySlider.onValueChange = [this] {
        processor.setFreq(frequencySlider.getValue());
    };

    addAndMakeVisible(frequencyLabel);
    frequencyLabel.setText("Frequency", dontSendNotification);
    frequencyLabel.attachToComponent(&frequencySlider, true);

    addAndMakeVisible(gainSlider);
    gainSlider.setRange(0.0, 1.0);
    gainSlider.setValue(0.5);
    gainSlider.onValueChange = [this] {
        processor.setGain(gainSlider.getValue());
    };

    addAndMakeVisible(gainLabel);
    gainLabel.setText("Gain", dontSendNotification);
    gainLabel.attachToComponent (&gainSlider, true);

    addAndMakeVisible(cutoffSlider);
    cutoffSlider.setRange(50.0, 10000.0);
    cutoffSlider.setValue(5000.0);
    cutoffSlider.onValueChange = [this] {
        processor.setCutoff(cutoffSlider.getValue());
    };

    addAndMakeVisible(cutoffLabel);
    cutoffLabel.setText("Cutoff", dontSendNotification);
    cutoffLabel.attachToComponent(&cutoffSlider, true);

    addAndMakeVisible(onOffButton);
    onOffButton.onClick = [this] {
        processor.setGate(onOffButton.getToggleState());
    };

    addAndMakeVisible(onOffLabel);
    onOffLabel.setText("On/Off", dontSendNotification);
    onOffLabel.attachToComponent (&onOffButton, true);
}
The methods that we declared in the previous step are basically called to set the value of the parameters of our DSP engine thanks to the processor object.
The resized method must be implemented so that the various UI elements that we created actually have a size:
void MonoSynthAudioProcessorEditor::resized()
{
    const int sliderLeft = 80;
    frequencySlider.setBounds(sliderLeft, 10, getWidth() - sliderLeft - 20, 20);
    gainSlider.setBounds(sliderLeft, 40, getWidth() - sliderLeft - 20, 20);
    cutoffSlider.setBounds(sliderLeft, 70, getWidth() - sliderLeft - 20, 20);
    onOffButton.setBounds(sliderLeft, 100, getWidth() - sliderLeft - 20, 20);
}
Finally, make sure that you clean the implementation of the paint method to get rid of the default ugly "Hello World:"
void MonoSynthAudioProcessorEditor::paint (Graphics& g)
{
    g.fillAll(getLookAndFeel().findColour (ResizableWindow::backgroundColourId));
}
Compile your plug-in and run it, it should look like this:

The goal of this section was just to show you how to integrate a Faust DSP object into a JUCE plug-in project and how to control it with a simple UI. Once again, JUCE is a powerful tool to implement sophisticated UI in a very simple way. You'll find all the documentation you need on their website to start making beautiful plug-ins!
Simple Audio Effect Plug-In
<< Download the source of this tutorial >>
In this section, we demonstrate how to use a Faust effect to build a plug-in in JUCE with a custom UI from scratch.
Generating the DSP Engine
The steps for generating an audio effect C++ DSP object with Faust are exactly the same as for a synth (see the previous section) and the faustMinimal.h architecture file can be used as well.
For this example, we'll be using a stereo echo:

Then run something like:
faust -i -a faustMinimal.h FaustEffect.dsp -o Effect/Source/FaustEffect.h
Creating a New Empty JUCE Plug-In Project
The steps are the same as for the mono synthesizer tutorial except that the "Plug-in is a Synth" checkbox shouldn't be checked this time. For this example, we decided to give a very bad and explicit name to our plug-in project: "Effect."
Finally, import the C++ file generated in the previous step (i.e., FaustEffect.h) in your project.
Integrating the Faust DSP Object to The JUCE Project
Steps are also similar to the mono synthesizer tutorial here, except that an audio input should be created. So, in PluginProcessor.h, we'll have:
private:
    MapUI* fUI;
    dsp* fDSP;
    float **inputs;
    float **outputs;
In PluginProcessor.cpp, for the prepareToPlay and releaseResources methods:
void EffectAudioProcessor::prepareToPlay (double sampleRate, int samplesPerBlock)
{
    fDSP = new mydsp();
    fDSP->init(sampleRate);
    fUI = new MapUI();
    fDSP->buildUserInterface(fUI);
    inputs = new float*[2];
    outputs = new float*[2];
    for (int channel = 0; channel < 2; ++channel) {
        inputs[channel] = new float[samplesPerBlock];
        outputs[channel] = new float[samplesPerBlock];
    }
}

void EffectAudioProcessor::releaseResources()
{
    delete fDSP;
    delete fUI;
    for (int channel = 0; channel < 2; ++channel) {
        delete[] inputs[channel];
        delete[] outputs[channel];
    }
    delete [] inputs;
    delete [] outputs;
}
and the audio callback:
void EffectAudioProcessor::processBlock (AudioBuffer<float>& buffer, MidiBuffer& midiMessages)
{
    ScopedNoDenormals noDenormals;
    auto totalNumInputChannels  = getTotalNumInputChannels();
    auto totalNumOutputChannels = getTotalNumOutputChannels();

    for (int channel = 0; channel < totalNumInputChannels; ++channel) {
        for (int i = 0; i < buffer.getNumSamples(); i++) {
            inputs[channel][i] = *buffer.getWritePointer(channel,i);
        }
    }

    fDSP->compute(buffer.getNumSamples(),inputs,outputs);

    for (int channel = 0; channel < totalNumOutputChannels; ++channel) {
        for (int i = 0; i < buffer.getNumSamples(); i++){
            *buffer.getWritePointer(channel,i) = outputs[channel][i];
        }
    }
}
This should be relatively self-explanatory.
Of course, the corresponding control methods should be created as well, etc.:
void EffectAudioProcessor::setDelay(float delay)
{
    fUI->setParamValue("delay",delay);
}

void EffectAudioProcessor::setFeedback(float feedback)
{
    fUI->setParamValue("feedback",feedback);
}
On the interface side, things can be easily adapted to match this new configuration with something like this:
EffectAudioProcessorEditor::EffectAudioProcessorEditor (EffectAudioProcessor& p)
    : AudioProcessorEditor(&p), processor(p)
{
    // Make sure that before the constructor has finished, you've set the
    // editor's size to whatever you need it to be.
    setSize(800, 100);

    addAndMakeVisible (delaySlider);
    delaySlider.setRange(0.0, 1.0);
    delaySlider.setValue(0.5);
    delaySlider.onValueChange = [this] {
        processor.setDelay(delaySlider.getValue());
    };

    addAndMakeVisible(delayLabel);
    delayLabel.setText("Delay (s)", dontSendNotification);
    delayLabel.attachToComponent (&delaySlider, true);

    addAndMakeVisible(feedbackSlider);
    feedbackSlider.setRange(0.0, 1.0);
    feedbackSlider.setValue(0.5);
    feedbackSlider.onValueChange = [this] {
        processor.setFeedback(feedbackSlider.getValue());
    };

    addAndMakeVisible(feedbackLabel);
    feedbackLabel.setText("Feedback", dontSendNotification);
    feedbackLabel.attachToComponent(&feedbackSlider, true);
}

void EffectAudioProcessorEditor::resized()
{
    const int sliderLeft = 80;
    delaySlider.setBounds(sliderLeft, 10, getWidth() - sliderLeft - 20, 20);
    feedbackSlider.setBounds(sliderLeft, 40, getWidth() - sliderLeft - 20, 20);
}
Try to compile your program and you should have a beautiful effect plug-in :).
Creating and Using a Polyphonic Faust DSP Object
<< Download the source of this tutorial >>
The procedure to create a polyphonic synthesizer DSP object is slightly different than for a simple monophonic synth such as the one presented at the beginning of this tutorial. Here, we'll be using the same Faust program as the one used for the mono synthesizer example. To enable polyphony, we just need to configure the nvoices metadata, which allows us to specify the maximum number of voices of polyphony of the DSP object that will be generated:

The package downloadable at the beginning of this tutorial contains a Faust architecture file slightly different from the one used in the previous examples (mono synth and effect): faustMinimalPoly.h. If you open it, you'll see:
#include <cmath>
#include <cstring>

#include "faust/misc.h"
#include "faust/gui/UI.h"
#include "faust/gui/JSONUIDecoder.h"
#include "faust/dsp/dsp.h"
#include "faust/dsp/dsp-adapter.h"
#include "faust/gui/meta.h"

// BEGIN-FAUSTDSP

<<includeIntrinsic>>

<<includeclass>>

// END-FAUSTDSP

#include "faust/dsp/faust-poly-engine.h"
#include "faust/audio/dummy-audio.h"

std::list<GUI*> GUI::fGuiList;
ztimedmap GUI::gTimedZoneMap;
faust-poly-engine.h contains the FaustPolyEngine class which can be used to turn a Faust C++ DSP object into a polyphonic synthesizer. In order for this class to work, an "audio driver" must be provided which is what the dummyaudio class available in dummy-audio.h can be used for. It also allows us to pass the sampling rate and the buffer size to FaustPolyEngine.
Compile the previous Faust program using this architecture file either by using the Faust command-line compiler or web IDE:
faust -i -a faustMinimalPoly.h FaustSynth.dsp -o PolySynth/Source/FaustSynth.h
and integrate FaustSynth.h to a new JUCE synth plug-in project (following the same steps as in the mono synth tutorial).
In PluginProcessor.h, declare the following objects:
private:
    audio *driver;
    FaustPolyEngine *faustObject;
    float **outputs;
    //==============================================================================
    JUCE_DECLARE_NON_COPYABLE_WITH_LEAK_DETECTOR (PolySynthAudioProcessor)
Once again, faustObject here will be the polyphonic Faust object and driver will be used to pass the sampling rate and buffer size to the system.
Don't forget to declare the corresponding empty classes at the beginning of the file:
class FaustPolyEngine;
class audio;

class PolySynthAudioProcessor : public AudioProcessor
{
In PluginProcessor.cpp, first don't forget to include FaustSynth.h. Then fill prepareToPlay with the following code:
void PolySynthAudioProcessor::prepareToPlay(double sampleRate, int samplesPerBlock)
{
    driver =  new dummyaudio(sampleRate,samplesPerBlock);
    faustObject = new FaustPolyEngine(NULL,driver,NULL);
    outputs = new float*[2];
    for (int channel = 0; channel < 2; ++channel){
        outputs[channel] = new float[samplesPerBlock];
    }
}
First, the empty audio driver is instantiated and passed to the Faust polyphonic object. Of course, we allocate memory for the audio output.
Resources are freed as follows:
void PolySynthAudioProcessor::releaseResources()
{
    //delete faustObject;
    delete driver;
    for (int channel = 0; channel < 2; ++channel) {
        delete[] outputs[channel];
    }
    delete [] outputs;
}
The processBlock method works the same way as for the mono synth tutorial except that the compute method is called here directly from the faustObject (FaustPolyEngine).
void PolySynthAudioProcessor::processBlock (AudioBuffer<float>& buffer, MidiBuffer& midiMessages)
{
    ScopedNoDenormals noDenormals;
    auto totalNumInputChannels = getTotalNumInputChannels();
    auto totalNumOutputChannels = getTotalNumOutputChannels();

    faustObject->compute(buffer.getNumSamples(),NULL,outputs);

    for (int channel = 0; channel < totalNumOutputChannels; ++channel) {
        for (int i = 0; i < buffer.getNumSamples(); i++) {
            *buffer.getWritePointer(channel,i) = outputs[channel][i];
        }
    }
}
While the setParamValue method can now be called directly from faustObject to set the value of specific parameters of the Faust object, other polyphony-specific methods are available such as keyOn and keyOff. For an exhaustive list, you can have a look at the source of FaustPolyEngine, which should speak for itself.
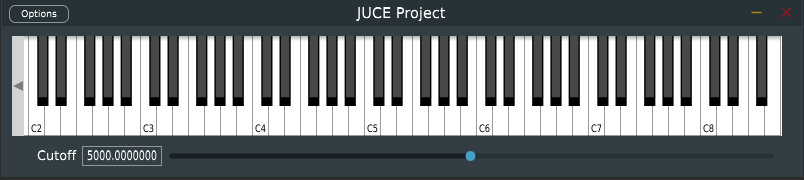
Our final goal for this tutorial is to create a simple plug-in with the following interface:
Hence, the Faust DSP object should be controlled with a polyphonic keyboard. New methods must be created in PluginProcessor.cpp to send key-on and key-off events from the PluginEditor to the PluginProcessor:
void PolySynthAudioProcessor::keyOn(int pitch, int velocity)
{
    faustObject->keyOn(pitch,velocity);
}

void PolySynthAudioProcessor::keyOff(int pitch)
{
    faustObject->keyOff(pitch);
}

void PolySynthAudioProcessor::setCutoff(float cutoff)
{
    faustObject->setParamValue("cutoff",cutoff);
}
Don't forget to declare these methods in PluginProcessor.h, of course.
keyOn will allocate a new voice, convert its pitch parameter into a frequency that will be sent automatically to the Faust freq parameter, velocity is converted to a level that will be sent to the gain parameter, and the gate parameter is set to 1. Inversely, keyOff sets gate to 0 and waits for t60 to be reached to de-allocate the current voice.
keyOn returns a voice ID whose type is unsigned long. This ID can then be used to change the parameter of a specific voice. We're not using this functionality in the example presented in this tutorial but here is how this would work:
unsigned long voiceID = dspFaust.keyOn(60,110);
dspFaust.setVoiceParamValue("/synth/cutoff",voiceID,378);
Note that voices can also be allocated directly without using keyOn and keyOff with the newVoice and the deleteVoice methods:
unsigned long voiceID = dspFaust.newVoice();
dspFaust.setVoiceParamValue("/synth/gate",voiceID,1);
// do something...
dspFaust.deleteVoice(voiceID);
Using setParamValue as we're doing in the current example, we can set the value of a parameter for all the voices of the DSP engine.
The following implementation is extremely primitive and only the messages from the UI keyboard are processed: we're just doing this for the sake of the example. If you've never worked with keyboards and MIDI in JUCE, we strongly recommend you to read this tutorial.
In PluginEditor.h, let's first add the following inheritance to the PolySynthAudioProcessorEditor class:
class PolySynthAudioProcessorEditor :
  public AudioProcessorEditor,
  private MidiInputCallback,
  private MidiKeyboardStateListener
{
This is necessary to implement the MIDI callback and the keyboard (UI) listener.
This inheritance requires us to implement the following methods in the
private section of PluginEditor.h. We also add an instance of a UI keyboard
and its associated state as well as a slider and its label to control the
cutoff frequency of the lowpass:
private:
  void handleNoteOn(MidiKeyboardState*, int midiChannel, int midiNoteNumber, float velocity) override;
  void handleNoteOff(MidiKeyboardState*, int midiChannel, int midiNoteNumber, float /*velocity*/) override;
  void handleIncomingMidiMessage(MidiInput* source, const MidiMessage& message) override;

  MidiKeyboardState keyboardState;
  MidiKeyboardComponent keyboardComponent;

  Slider cutoffSlider;
  Label cutoffLabel;
In PluginEditor.cpp, we can add the keyboard and the slider to the constructor:
PolySynthAudioProcessorEditor::PolySynthAudioProcessorEditor (PolySynthAudioProcessor& p)
    : AudioProcessorEditor(&p), processor(p), keyboardComponent (keyboardState, MidiKeyboardComponent::horizontalKeyboard)
{
    setSize (800, 150);

    addAndMakeVisible(keyboardComponent);
    keyboardState.addListener(this);

    addAndMakeVisible(cutoffSlider);
    cutoffSlider.setRange(50.0, 10000.0);
    cutoffSlider.setValue(5000.0);
    cutoffSlider.onValueChange = [this] {
        processor.setCutoff(cutoffSlider.getValue());
    };

    addAndMakeVisible(cutoffLabel);
    cutoffLabel.setText("Cutoff", dontSendNotification);
    cutoffLabel.attachToComponent(&cutoffSlider, true);
}
and we must de-allocate the keyboard state listener in the destructor:
PolySynthAudioProcessorEditor::~PolySynthAudioProcessorEditor()
{
    keyboardState.removeListener(this);
}
The implementation of the setCutoff method is detailed later in this tutorial and is very similar to the one described in the previous section.
We also need to define the size of the various elements in the interface (as we did before):
void PolySynthAudioProcessorEditor::resized()
{
    const int sliderLeft = 80;
    keyboardComponent.setBounds (10,10,getWidth()-30,100);
    cutoffSlider.setBounds(sliderLeft, 120, getWidth() - sliderLeft - 20, 20);
}
MIDI messages are retrieved from the keyboard simply by implementing the following inherited methods:
void PolySynthAudioProcessorEditor::handleIncomingMidiMessage (MidiInput* source, const MidiMessage& message) {}

void PolySynthAudioProcessorEditor::handleNoteOn(MidiKeyboardState*, int midiChannel, int midiNoteNumber, float velocity)
{
    processor.keyOn(midiNoteNumber,int(127*velocity));
}

void PolySynthAudioProcessorEditor::handleNoteOff(MidiKeyboardState*, int midiChannel, int midiNoteNumber, float /*velocity*/)
{
    processor.keyOff(midiNoteNumber);
}
That's it folks! Try to compile and run your plug-in, it should just work. Of course, things could be significantly improved here but at this point, you should be able to sail on your own.